|
|
 |
|
|
|
Welcome to the Australian Ford Forums forum. You are currently viewing our boards as a guest which gives you limited access to view most discussions and inserts advertising. By joining our free community you will have access to post topics, communicate privately with other members, respond to polls, upload content and access many other special features without post based advertising banners. Registration is simple and absolutely free so please, join our community today! If you have any problems with the registration process or your account login, please contact us. Please Note: All new registrations go through a manual approval queue to keep spammers out. This is checked twice each day so there will be a delay before your registration is activated. |
|
|||||||
 |
|
|
Thread Tools | Display Modes |
|
|
#1 | ||
|
Regular Member
Join Date: Apr 2010
Posts: 95
|
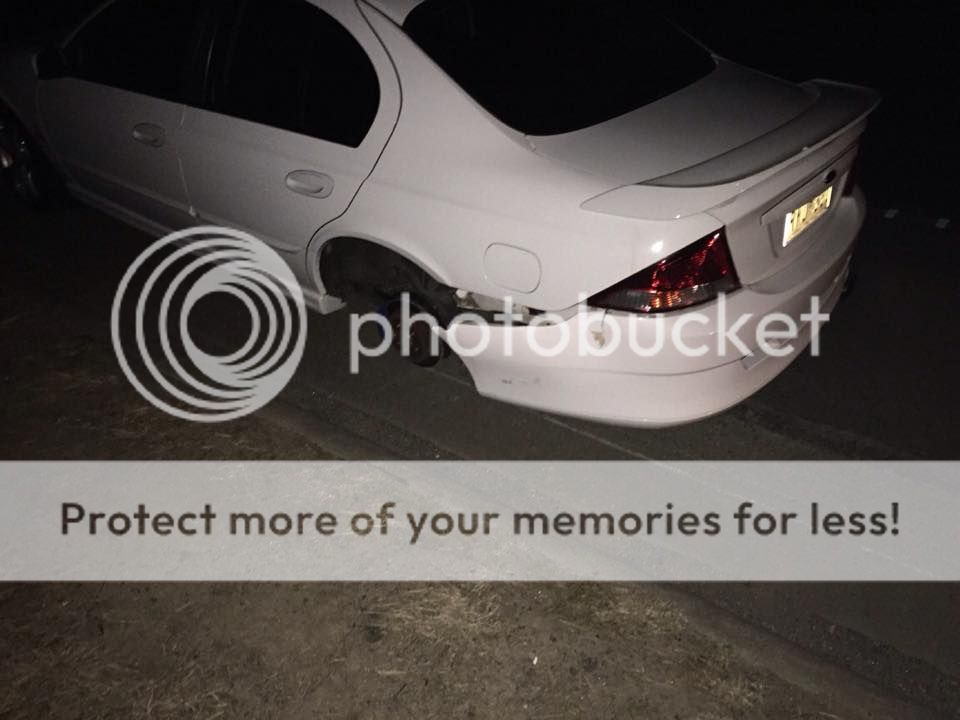
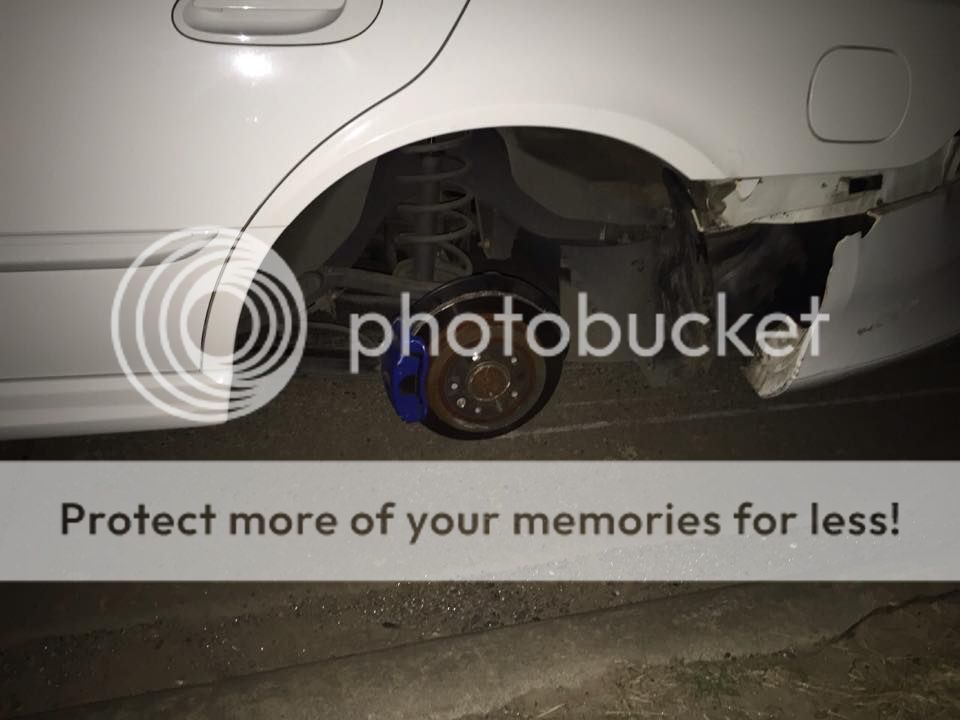
Long story short driving 3 hours to Melbourne, an hour out my passenger side rear wheel studs break off and i lose a wheel ect ect... i have since got new wheel studs ect.. going to drive home tomorrow and want to know if im better off running the spare wheel on the rear or front of the car as i dont want to damage the diff ect...
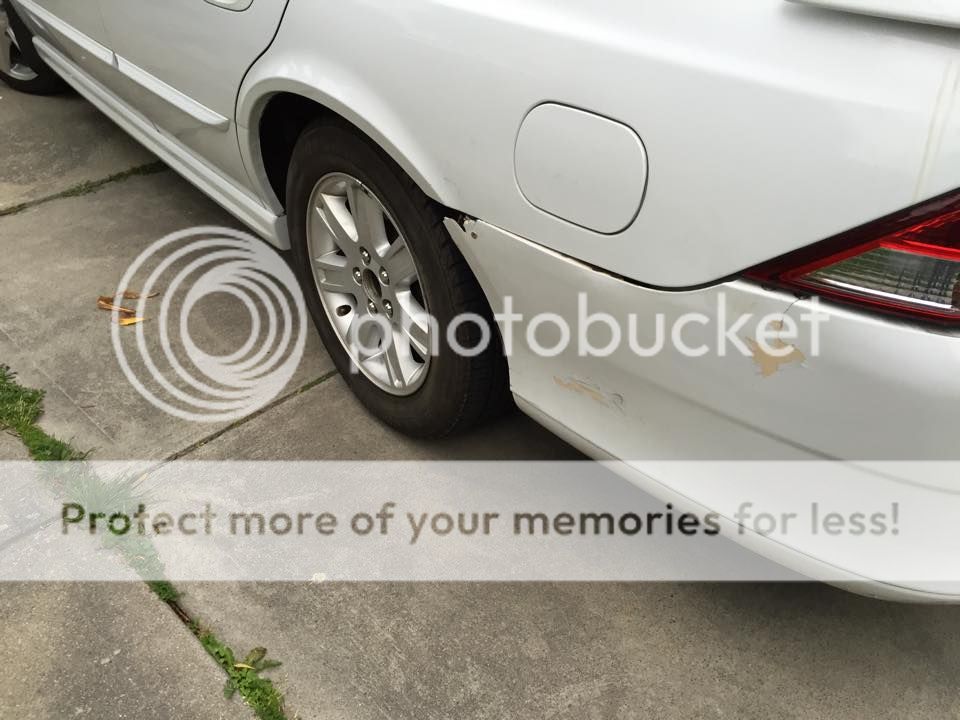
also.. anybody got any tips for repairing the bumper with fiberglass?     |
||
|
|

|
|
|
#2 | ||
|
PM me if you want
Join Date: Dec 2004
Location: Pk Ranger Modding - QLD 👍
Posts: 7,498
|
Take the bumber off and put it in the car if possible. Otherwise decide if it's worth fixing. If not big tec screws through bumper into the metal to hold it on. Otherwise cloth tape lots of it will work.
Spare would be better off on the rear usually.
__________________
Owner of first ever car to retrofit BA SSS - the EA2BA Send me a PM if you want to know anything 2010 Ford Ranger PK High Rider (Auto) - 2011 Ford Fiesta (Auto)
|
||
|
|

|
|
|
#3 | ||
|
Stay Classy ™
Join Date: Apr 2005
Location: Sydney
Posts: 2,044
|
I'd figure out why ALL of your studs broke off ... was the wheel locating snuggily on the hub? Chaz had a few issues with studs a while back because of the centre bore being the wrong size from what I recall
|
||
|
|

|
|
|
#4 | ||
|
Regular Member
Join Date: Apr 2010
Posts: 95
|
well that would be an interesting and worth looking into thing because if that were the case that would be the fault of bob jane t mart as i brought the wheels and tyres off them.. hmm So.. anybody quickly tell me if i should have it on the rear or front of the car for a 300+k drive home?
|
||
|
|

|
|
|
#5 | ||
|
FF.Com.Au Hardcore
Join Date: Dec 2004
Location: Newcastle NSW
Posts: 7,890
|
They brought the wheels from their workshop and fitted them to your car but you bought the wheels off them !
Anyway, you didn't feel any vibration before the wheel departed company ?
__________________
T3 TL50 #147 Silhouette Auto ESS - Brembos - Last of 3 in T3 spec, only AUIII TL50 ever built -14.2 sec @ 98mph bog stock. Only customer ordered T3 TL50 built, only LWB sedan plated AUIII and the last performance enhanced LWB sedan built by Ford Aust. AUII Fairlane Ghia Sportsman 5.0L in Blue Pearl OWN THE ROAD |
||
|
|

|
|
|
#6 | ||
|
Regular Member
Join Date: Apr 2010
Posts: 95
|
yes but wouldn't it be their job to give me the correct wheels for my car? and yeah well i was on the freeway doing 110 and felt the strange vibration so began to slow down and pull over to the emergency lane.. but was probably still going like 20 or 30 when the wheel actually came off and the car dropped to the ground.. the wheel itself rolled around on the disc for a little before it came out from under it which was probably also lucky,.,
|
||
|
|

|
|
|
#7 | ||
|
Regular Member
Join Date: Mar 2014
Posts: 111
|
Loose nuts, not properly tensioned. Take it back and have them pay for the damage. Also you want the wheels on the back to be the same size or else your diff will surely fail by the time you get back home.
|
||
|
|

|
|
|
#8 | |||
|
Regular Member
Join Date: Apr 2010
Posts: 95
|
Quote:
http://www.ebay.com.au/itm/18-HOSTIL..._qi=RTM1714243 but most likely not from ebay.. haha |
|||
|
|

|
|
|
#9 | ||
|
PM me if you want
Join Date: Dec 2004
Location: Pk Ranger Modding - QLD 👍
Posts: 7,498
|
fibreglassing is not that hard to do, but look up the best way to repair the damage and do it as properly as you can or it will just crack again and fail later.
__________________
Owner of first ever car to retrofit BA SSS - the EA2BA Send me a PM if you want to know anything 2010 Ford Ranger PK High Rider (Auto) - 2011 Ford Fiesta (Auto)
|
||
|
|

|
|
|
#10 | ||
|
Guest
Join Date: May 2013
Posts: 1,934
|
The bumper:
I'd be inclined to shape a length of timber to fit across the outer skin whilst it's still on the car. This will ensure it's in the correct position before repairs. Just run some screws through the timber into the plastic, enough to be sure it will stay in the same shape when you remove it. Screw holes can be filled with bog after repairs are done. Once the bumper is off the car, start on the inside & layer up some glass & resin on the corner bend to strengthen it. First, scar the plastic lightly with a grinding flap disc maybe. This will give the resin something to bite to. Overlap as much as is practical. The more overlap between glass & bumper, the stronger it'll be. To fill the front broken corner, I'd shape some styrofoam/rubber foam to match the outer shape & stick it in place by running cloth tape on the outside of it to keep it in place while you lay on the glass & resin from the inside. Might need a bit of gladwrap to cover the rubber/foam so the resin won't bond to it. Test the resin on some foam first to see if it melts! You might need rubberized foam, like yoga mat material. You'd need to lay that corner of the bumper flat on the ground to make it easier to lay the resin. Gravity does the work for you that way. First put a straight edge on the broken edge then scar the plastic lightly on the edge & the inner, overlap the glass at least 5 or 6 inches onto the inside of the bumper, this way it'll never fall out. Again with the broken corner, once you've got it straight & scarred & laying flat (with the outside of the bumper facing the ground), cut some glass matting to fit the bit you cut out, then lay the matting down on the rubber mold you stuck on the outside, lightly splash on some resin with a brush (try not to saturate it), then more matting, load up the resin this time, more matting, more resin, keep building up the layers until it's level with the inner plastic, then lay a larger bit of matting on to overlap onto the inner, load up the matting & resin so it's a good 3 or 4 millimetres higher than the level of the inside of the bumper. *********************************************** You could fit a block of wood or foam to the inside of the bumper & then fill it with resin/glass matting from outside, but this would most likely break free & fall out, even if you lay more resin on the inside to overlap. Wet resin sometimes won't stick to dry resin, even if you sand it in preparation. So filling it all in one go from the inside would be best practice. ************************************************** * To finish the outer surface (the front corner), brush on some resin, layer it in stages so it's 1 or 2mm higher than the bumpers surface, then you can sand it flush. For the crack in the rounded corner of the bumper (under tail light), use body filler once your glassed inner patch is hard. Then sand it flush. Also, when resin hardens, it sometimes leaves a slimy coating as a result of the chemical reaction between the resin & the catalyst. This is called "Bloom". Hot soapy water is by far the easiest way to clean off bloom. Then the hard resin can be sanded, painted. Use Acetone to clean wet resin from brushes.(wear some latex surgical gloves when laying glass & resin) Now, having said all that, be aware that when plastic is bent &/or stretched, as your bumper has done, it's almost impossible to get it perfect again. Plus it is somewhat flexible so it may be that the resin/glass patches simply pop off if the bumper gets bent or impacted again in the future. Another option is to completely cut out the damaged section & glass in a bit from another bumper. Again, overlap the cut edges with glass & resin on the inner, then use body filler on the outer to fill the cut line, sand flat, then repaint...the whole bumper! Personally, if it were me, I'd be looking to get a new bumper!!! Good luck with it champ. |
||
|
|

|
|
|
#11 | ||
|
Next upgraded Mk1 Leopard
 Join Date: Jan 2005
Location: Sydney, in the burbs
Posts: 4,917
|
Nice reply
UK
__________________
Plastic Surgery 1 AUII Monsoon Blue How 2's: Change rear view mirror, Install backfire valve, Change foam front seats, Install auto transmission cooler, Replace Trans Shift Globe, Remove front door Trim, Paint AU headlights, install door spears, Premium Rear Parcel Shelf, go here...
 Last edited by Uncle_Ken; 14-10-2014 at 12:19 PM. Reason: wording |
||
|
|

|
|
|
#12 | ||
|
Regular Member
Join Date: Apr 2010
Posts: 95
|
yep.. Very good reply.. Thanks.. That is all very usefull and informative
 Thanks FlivverFord and everybody really. Thanks FlivverFord and everybody really.  trying to find a new set of wheels now too.. im thinking of going for some 18*8 Black PDW CSPEC wheels... has anybody seen them on a white au? trying to find a new set of wheels now too.. im thinking of going for some 18*8 Black PDW CSPEC wheels... has anybody seen them on a white au?
|
||
|
|

|
|
|
#13 | ||
|
PM me if you want
Join Date: Dec 2004
Location: Pk Ranger Modding - QLD 👍
Posts: 7,498
|
Decent pic of car + decent pic of wheels you want, and then post both in the photoshop forum, and you can see it.
__________________
Owner of first ever car to retrofit BA SSS - the EA2BA Send me a PM if you want to know anything 2010 Ford Ranger PK High Rider (Auto) - 2011 Ford Fiesta (Auto)
|
||
|
|

|
|
|
#14 | ||
|
FF.Com.Au Hardcore
Join Date: Feb 2005
Location: Melb north
Posts: 12,025
|
I think the done thing is after having wheels fitted, after a drive or the very next day the wheel nuts should be "RETENSIONED", not many do it though, not saying that is the cause of the problem in this case, but is the correct protocol .
|
||
|
|

|
|
|
#15 | ||
|
Stay Classy ™
Join Date: Apr 2005
Location: Sydney
Posts: 2,044
|
I'm a little curious why you would have to have the wheel nuts tightened after doing them up? The wheel should be centered and a snug fit on the center bore - the nuts are just so the wheel doesn't slide off
|
||
|
|

|
| This user likes this post: |
|
|
#16 | ||
|
FF.Com.Au Hardcore
Join Date: Feb 2005
Location: Melb north
Posts: 12,025
|
after a heat cycle of the metal heating up and cooling down its a good idea to check wheel nuts, dont ask me why but sometimes despite doing them up tight initially you find them less tight, so its always a good idea to recheck them.
If you keep your eyes open on the forum now and again you will see the odd bloke report having loose wheel nuts after job x was done day/s before. It seems to be less worried about with cars , with trucks it seems to be more widely accepted that this is the done thing. |
||
|
|

|